
Welcome back friends & followers! Today I am going to show you how to make a cute little luminary using an electric tea light and Newton's Nook Designs' 'Boo Crew' set:

Step 1: Assemble your supplies:

- Boo Cream set by Newton's Nook Designs,
- 5" x 2 1/2 " piece of black cardstock,
- 5" x 1/2" piece of orange cardstock,
- 2" x 1 3/4" piece of vellum,
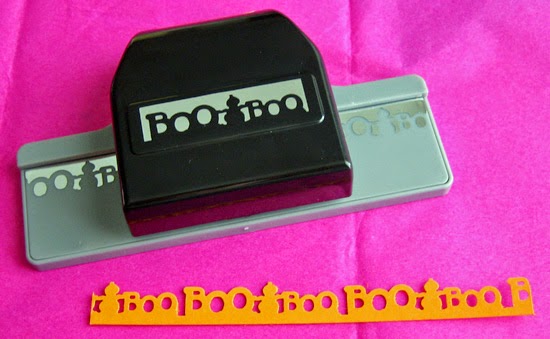
- border punch (I used this 'Boo' one by EK Success),
- adhesive (I use Tombow Mono Adhesive tape),
- Scotch tape (to adhere vellum and secure back of luminary),
- markers to color in kitty (I used Bic Mark Its in Peach Parfait & Summer Melon),
- black & white inks (not pictured - I used Memento Tuxedo Black & Palette New Canvas),
- craft knife & mat (not pictured), and
- an electric tea light.
Step 2: punch border from orange cardstock strip:
Step 3: Stamp 'ghost kitty' image from Newton's Nook Designs 'Boo Crew' set on vellum using black ink (I have this step early so it has a little time to dry and won't smudge):

Step 4: Color in ears, feet & tail if desired. I used Bic Mark Its in Peach Parfait for a light orangey color like the real-life Newton kitty, and peach parfait for the ear spaces:

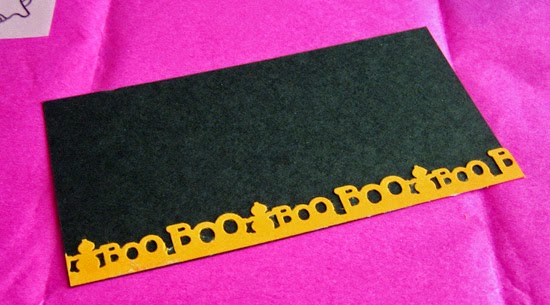
Step 5: Attach orange 'Boo' border to black strip of cardstock:
Step 6: Using a white ink, stamp the ghost kitty image again above the Boo border (in retrospect, I wish I had stamped a bit higher so the tea light would not be visible at the bottom - to avoid this you could measure the height of the tea light and make sure you stamp higher than that measurement from the Boo border on your cardstock, for mine, it would have been just another 1/4" higher):

Step 7: Once you are sure the white outline image is dry, cut the image out around the edges; this will create your opening for the vellum image. I personally chose to leave a border so the black outline image of the ghost kitty would show through. I used a craft knife & mat underneath:

When you are done it will look like this:

Step 8: Flip your strip of black cardstock over to the side that does not have the border attached and align the vellum stamped ghost kitty image over the opening - note, the stamped side will face down or away from you (I personally hold the strip and vellum piece up to a window or light source during alignment). When you are satisfied with the position tape in place with Scotch tape - make sure you are taping on the side without the border, that is that back, which will be inside your luminary.

Step 9: Wrap your cardstock, border side out, around the tea light (note - it helps if you curl the cardstock with your fingers a bit so the paper curves better). Secure in place with really strong tape (if you don't want it to show) or Scotch tape (which is what I did, it is in the back and no one will see it anyway). And.... VOILA! Electric tea light luminary complete!

(As a safety precaution, I would not recommend you leave these on when you are not home or unattended)
Easy peasy right? And cute huh? YOu could make a bunch of these and put them in the windows of your house on Halloween! How fun & festive would that be?!!
Thanks so much for stopping by. I hope you liked my tutorial. Would you like to see more of these from me in the future? I'd love to know your thoughts.
Have a crafty day!
~ Crafty Math Chick
4 comments:
Honey, this is brilliant!
What a gorgeous project and great tutorial. Fab work x
This turned out fantastic - and you make it look so easy. Thanks for the tutorial!
How cute! I am going to have to give these a try!
Post a Comment